What is an export profile
- Antonio Maradiaga
- Support Team
Export Name Tab
The Export name tab contains filename related settings for export operations.
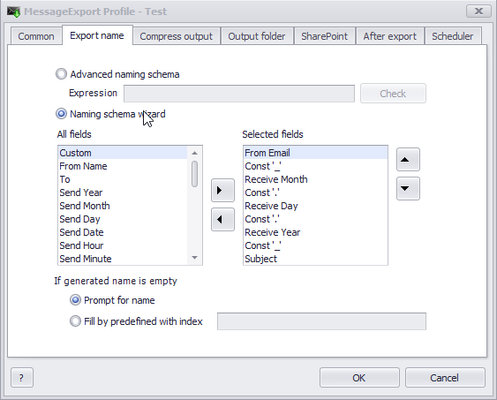
Advanced naming schema and Naming schema wizard radio buttons are used to switch between two naming schemas. See Naming schema topic for more info on naming schemas.
When Advanced naming schema is active, exported message names can be generated from the text in Expression field.
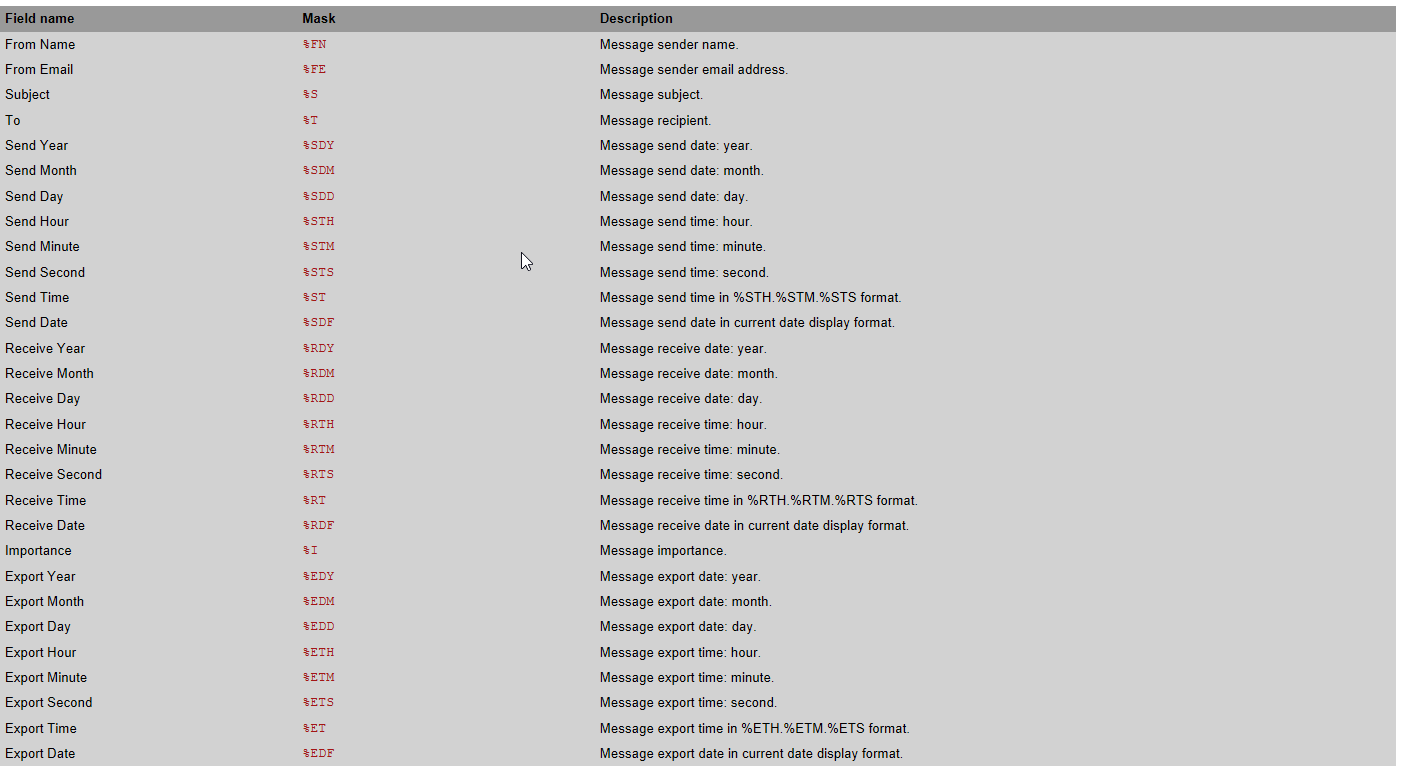
Here are the supported text strings:
Check the button may be used for checking inputted advanced naming schema validity.
When Naming schema wizard is active, exported message names will be generated form selected fields in wizard naming schema control.
If generated name is empty the section allows you to set up message naming for the case, when the name generated by the active naming schema is empty.
Prompt for name the option will cause a dialog with a message name request appears each time this situation occurs.
Fill by predefined with index this option will name these messages with text from the field appended with the unique index for each next message (_001, _002, etc).
Compress Output Tab
Compress output tab of profile dialog contains archiving settings for profile exporting.
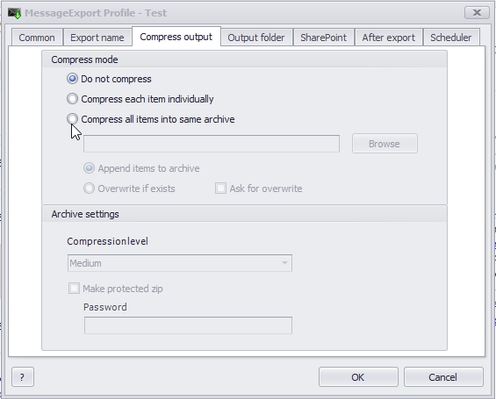
Compress mode section contains main options for archiving exported messages. If Do not compress option is active, exported messages will not be archived.
If Compress each item into separated archive option is active, each exported message will be put in a separated archive in output folder.
If Compress all items into same archive option is active, all exported messages will be put into single archive. In this case, you will have to specify archive file name and location either typing it or via Browse button.
Append items to archive and Overwrite if exists options set up action for a case if archive with inputted name already exists.
Ask for overwrite checkbox toggles confirmation dialog display for overwriting files with existing names.
Archive settings section contains compression and protection options for created archives. It is active only when
Compress each item into separated archive or Compress all items into same archive options are selected.
Compression level drop-down list allows to specify compression level for archives.
If Make protected zip is checked, created archives will be protected with password specified in Password field.
Output Folder Tab
Output folder tab of profile dialog contains folder related settings for profile exporting.
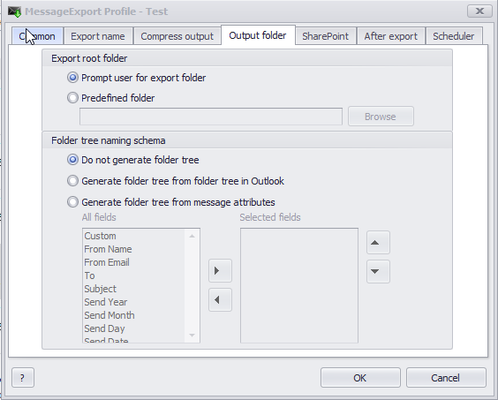
Export root folder section defines the destination folder for MessageExport. It is active only when Compress all items into same archive option is not selected in the Compress output tab. Otherwise, email will be exported to the folder in which the archive is located.
Prompt user for export folder Causes a target folder selection window to appear during an export operation.
If Predefined folder is selected, you will have to set destination folder either by typing it, or using the Browse button.
Folder tree naming schema section allows generation of folders tree in the destination folder. Names of the folders in this tree can be taken from different email attributes or copied from the Outlook folder tree.
If Do not generate folder tree is selected, an email will be exported directly to the specified folder without creating any subfolders.
If Generate folder tree from folder tree in Outlook is selected, MessageExport will attempt to save exported email messages in a way that mimics the Outlook folder tree structure.
If Generate folder tree from message attributes is selected, a tree will be generated in the destination folder, with folder names taken from wizard naming schema control.
SharePoint Tab
SharePoint tab of profile dialog lets you export converted emails directly to Microsoft SharePoint Server libraries.
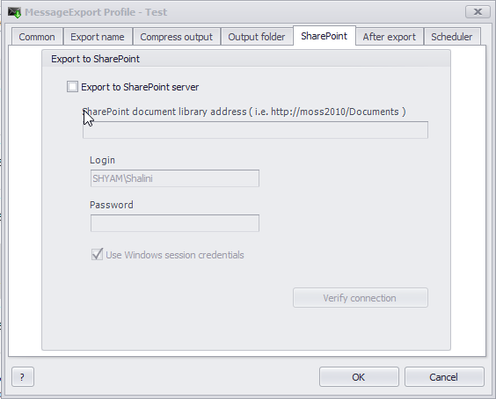
Export to SharePoint server To enable exporting message files to SharePoint server, first specify the SharePoint document library address in the address field.
A list of document libraries is available in the left side of SharePoint web page. To manage document libraries click Site Hierarchy link. For details, check your SharePoint server manual.
Document library URL usually has a form of:
Error! Hyperlink reference not valid.
- document library URL for Documents library on http://moss SharePoint server will be:
Login and Password fields must contain user credentials. They are used to authenticate user at SharePoint server to enable files uploading. Leave the fields blank to use current logged on user credential.
Verify connection button allows you to verify the SharePoint server library address, login and password.
Note: when exporting to SharePoint Action for existing files and Compress items into same archive options are not available.
After Export tab
The After export tab lets you to add custom actions that occur immediately after an email export operation.
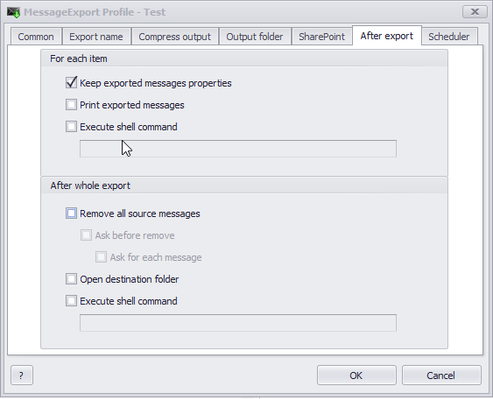
For each item This section contains options for actions to be done after each message has been exported.
With Keep exported message properties option active, message Subject, Category and To fields would be added to exported file metadata. This information is viewable in Summary tab of Windows Explorer. If messages are exported to SharePoint server, this option will toggle assigning attributes to uploaded files.
After checking Execute shell command, you can enter Windows shell command in a field below. This command will be executed after each MessageExport. For example, enter 'calc' to call Windows Calculator.
After whole export section contains options for actions to be done after all messages have been exported.
If Remove all source messages checkbox is checked, exported messages will be deleted from Outlook. A confirmation dialog will appear for once all items if Ask before remove option is selected. A confirmation dialog will appear for each item if Ask before remove option is also selected.
Open destination folder setting allows you to open folder to which messages have been exported.
Print items after export option will print exported messages using default system printer.
After checking Execute shell command, you can enter Windows shell command in a field below. This command will be executed after all messages have been exported. For example, enter 'calc' to call Windows Calculator.
Scheduler tab
Scheduler tab allows exporting email on a regular timed interval.
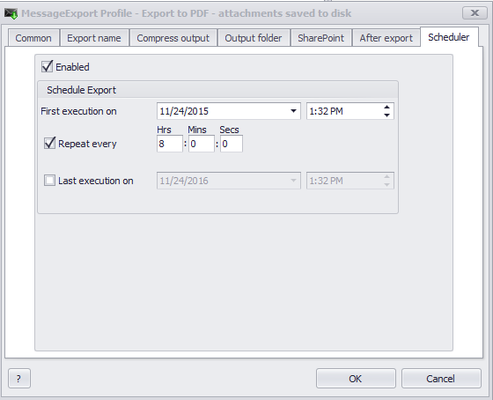
Enabled
Check Enabled to activate the export timer feature.
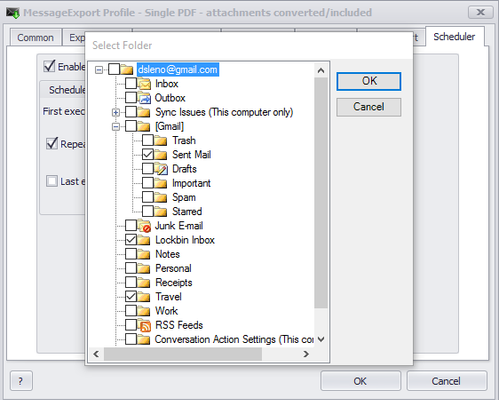
Next, select the folder or folders from which email will be exported.
First execution on
This checkbox is used to indicate date and time that the first export operation will begin.
Repeat every checkbox will cause export to repeat every time period stated.
Last execution on checkbox will stop the export at a time specified.
Note. It is recommended to turn Export History on to avoid extra messages to be exported.